How to Remove Malware & Clean a Hacked WordPress Site
Introduction
Sucuri has devoted years to helping WordPress administrators identify and fix their hacked websites. We have put together this guide to walk WordPress owners through the process of identifying and cleaning a WordPress hack. This is not meant to be an all-encompassing guide, but if followed, should help address many of the infections we see.
Contents
Why do WordPress Sites Get Hacked?
WordPress is the most widely used Content Management System on the web. More than 40% of the websites online use WordPress, which makes it a prime target for attackers. There are many different types of hacks that target WordPress sites, ranging from spam infections to more complicated credit card stealer attacks.
Here are a few common reasons why a website might be hacked.
1. Vulnerable CMS, Plugins, or Themes
Attackers regularly leverage vulnerabilities in CMS and third-party components to compromise websites. Automated attacks targeting known website vulnerabilities are one of the leading causes of hacked websites. Always keep your CMS and third-party components updated with the latest patch.
2. Weak Passwords
Brute force attacks guess thousands of login combinations to obtain unauthorized access to a website. If you’re using weak or easily guessable credentials on your website or database, you’re much more likely to fall victim to a brute force attack — especially if you’re not using a website firewall to prevent it.
3. Incorrect File Permissions
Your web server uses a number of rules to control access to website files. If file permissions are too relaxed, hackers are easily able to modify website files.
Signs That Your WordPress Site is Hacked
How do you know if your website has been compromised? There are a handful of obvious signs and symptoms to look out for.
1. You can’t log in to your admin panel.
Attackers occasionally remove users or change passwords to prevent access to a hacked website. Try resetting your password — if you’re not able to regain access to your user account, it may have been deleted from WordPress.
2. Your security plugin or file integrity monitoring has notified you of an unexpected change in your environment or website files.
If you’ve found changes to core system files or your security plugin has notified you of unexpected file changes, this is a sign that an attacker may have modified your website files to send spam emails, create website backdoors, or run malicious code.
Any new files with suspicious looking names or server-side scripts in upload directories are a major red flag that your website has been compromised.
3. Your hosting provider has contacted you with notifications about unusual account activity or has disabled your website.
Hosting companies perform regular scans and audits for malicious behavior or malware and often disable any websites with known issues to prevent cross contamination in shared hosting environments.
4. Browser warnings are served to you or your site visitors when attempting to access the website.
If Google Chrome or another browser displays a warning message when viewing the site, odds are you’ve been hacked. This also indicates that your site has been blacklisted by a known authority like Google Safe Browsing.
5. Google Search Console displays a warning message stating your site’s been hacked or is serving malware.
Google sends site owners who’ve linked their domain to Google Search Console notifications whenever a site has been compromised. These notifications provide valuable information about whether spam content or malicious code has been found on your website.
6. When you search for your domain, a warning message is displayed.
Search authorities like Google and Bing provide warnings to users to help mitigate risk and protect them from pages that serve malware or phishing. If you’re receiving warning messages about deceptive or dangerous websites when you search for your domain, it’s likely that your WordPress site has been hacked.
7. Customers are complaining about credit card theft.
Credit card theft is an incredibly lucrative business for many attackers, as sensitive credit card details can easily be sold for money on the black market or used to make fraudulent purchases. Attacks on e-commerce websites are typically targeted and leverage known vulnerabilities in plugins, themes, and other third-party components.
8. There’s strange looking JavaScript in your website code.
Attackers often use obfuscation techniques, formatting and code comments to conceal their malware from view. Even a small snippet of malicious JavaScript can be used to harvest credit card details or passwords from a hacked website.
9. Your website has become extremely slow.
Some malware use significant server resources. If your web pages have suddenly become very slow and take longer to load, you will want to investigate further and determine if your WordPress site has been hacked.
10. Your website is redirecting somewhere else.
Many attackers inject malicious redirects to send your website’s traffic to their ads or spam pages in an attempt to increase SEO and hijack traffic for their own domains. If you or your visitors are suddenly being sent to a spam landing page when accessing the site, you’ve likely become infected with a malicious website redirect.
11. You see changes on your website but you don’t know how they got there.
For example, if the homepage has been modified or replaced with a new page, content has been added to existing pages, or new pages have been created, this is an indicator of compromise and should be investigated.
Steps to WordPress Malware Removal
There are several important steps to take if your WordPress website has been hacked. Regardless of how your WordPress site has been compromised, here are a few key moves you can make to get your site back as quickly as possible.
1. Take a deep breath and don’t panic.
It’s important to maintain a clear head before taking steps to fix a hacked website. Do whatever you can to relax or take a moment of Zen. Some of the changes we recommend will require you to be focused.
2. Scan your website to identify the problem.
Identifying the type of hack will help you understand where to focus your efforts and pinpoint the location of malicious content and payloads. Remote scanning and server side tools can help you identify where the infection is.
3. Identify if Core WordPress files were compromised.
Check to see if core files have been maliciously modified by performing an integrity check of your core WordPress files. Most core files should never be modified unless an update has recently been performed.
4. Check for recently modified files.
New or recently modified files outside of the WordPress core may be a part of the hack. You can use SSH, cPanel, FileZilla and other tools to identify if any files have been recently modified.
5. Leverage diagnostic tools to check the security status of your site.
Use diagnostic tools provided by Google, Bing, Norton and other search authorities to check the security status of your WordPress site.These tools will provide valuable reports and ratings to help you identify security problems.
6. Remove the malware from your WordPress site and database.
Cleaning up malware infections from your WordPress files, plugins, themes and database is an important step. You can restore customized plugins or themes from a clean backup to avoid erasing any changes that you’ve made.
7. Find and remove hidden backdoors.
Hackers often leave a backdoor that allows them to regain access to your WordPress website. Backdoors can come in a variety of shapes and sizes, and you can easily find more than one type of backdoor in a hacked website.
8. Remove blacklisting and malware warnings.
Google, McAfee, Norton and other vendors will blacklist websites that are hacked and infected with malware. You’ll need to fill out a review request for any websites that have been blacklisted.
9. Update your CMS, plugins and themes.
Outdated software is one of the leading causes for website infections. Update your CMS, plugins, themes, and other software to apply the latest security patches and protect your environment from known vulnerabilities.
10. Delete unused components.
Create fewer entry points for attackers by deleting unused software, plugins, or themes from your WordPress website. Keep a working backup to easily restore from in the event of a problem.
11. Change passwords and generate new secret keys.
Changing your passwords for all user accounts, FTP/STFP, SSH, cPanel, and databases is a crucial step to recovering from a hack. All accounts should use strong, unique passwords to protect your entry points.
12. Harden your WordPress website.
Take steps to reduce the attack surface of your website. Website hardening can include adding server configuration rules, setting up multi-factor authentication, isolating your website from cross-contamination, restricting IPs and setting up CAPTCHA to deter automated attacks.
13. Create website backups.
Backups are your safety net and make it easy to recover from a security incident or data loss. Good backup strategies are the core of a good security posture and help you prepare for emergency scenarios.
14. Use a website firewall.
Website firewalls create a perimeter defense around your WordPress website and can help mitigate DDoS, vulnerability exploits, brute force attacks, and other threats. You’ll also enjoy the benefit of caching, which can optimize your search engine rankings and provide performance optimizations for your WordPress site!
If it feels like a lot to take in, don’t worry. We’ll cover each one of these steps more in-depth throughout the guide.
STEP 1
Find & Identify a WordPress Hack
1.1 Scan Your WordPress Site
The first step to removing malware from your WordPress site is to identify the type of hack. This will help you narrow down the infection to make it easier to find.
You can use tools that scan your site remotely to find malicious payloads and malware. For examle, Sucuri has a free WordPress plugin that you can find in the official WordPress repository. You can also scan your site with tools online to find the location of malicious content and payloads.
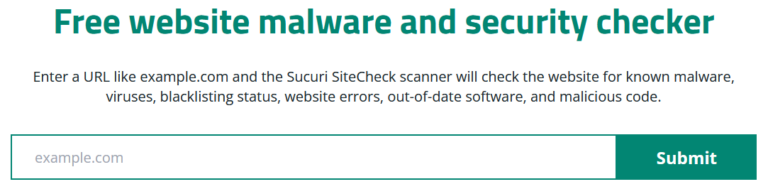
How to scan WordPress for malware with Sucuri Sitecheck:
If the remote scanner isn’t able to find a payload, continue with other tests in this section. You can also manually review the iFrames / Links / Scripts tab of the Malware Scan to look for unfamiliar or suspicious elements.
If you have multiple WordPress sites on the same server, we recommend scanning them all (you can also use SiteCheck to do this). Cross-site contamination is one of the leading causes of reinfections. We encourage every website owner to isolate their sites in their own hosting environments.
A remote scanner will browse the site to identify potential security issues on your WordPress site. Some issues may not show up in a browser. Instead, they manifest on the server (i.e., backdoors, phishing, and server-based scripts). The most comprehensive approach to scanning includes remote and server-side scanners. Learn more about how remote scanners work.
How to scan your site to view page requests:
- Visit the WebPage Test website.
- Enter your website and click Start Test.
- Click on the waterfall result.
- Review the request details.
- Note any suspicious or unrecognizable requests.
This external tool provides insights into what is loading on your WordPress site. From here, you can review all page requests being made when your site is loaded which can help you narrow down any malicious/unwanted domains loading on your site.
Pro Tip: If you do not recognize a domain name loading on your site and would like to research it, refrain from visiting the domain directly. Perform the tips listed below to mitigate risk, instead.
How to review external domains loading on your site:
There are a variety of different methods available to help you review your site for externally loading domains. You can leverage one or more of the following tools.
- SiteCheck:Search for any suspicious domain names with SiteCheck to see if they are being blocklisted.
- Google: Search for Google results for a domain name using site:example.com within Google, then review the results. If you do not trust the domain, do not click on these results; simply review them to see if they might be related to your site’s code. (Example: Domains used by plugin authors, theme authors, etc.)
- URLScan.io: Search for URL results with URLScan.io to obtain a plethora of information about a site. You’ll be able to see where the site is hosted, what the requests are doing, and the overall behavior of the site without accessing it directly.
- VirusTotal: Search for results of a domain with VirusTotal, a free blocklist vendor checker. Results will be shown for the following items.
- Detection: Check a website blocklist status from 70+ vendors
- Details: View the history and HTTP response from a site.
- Links: Review any outgoing links.
- Community: Review comments from the public about the safety of a site.
Don’t want to do this yourself?
Our professional incident response team can have your WordPress site cleaned quickly. We’re here for you 24/7/365!
1.2 Check Core WordPress File Integrity
WordPress installations are made up of many core files that stay consistent between versions. Most core files within WordPress should never be modified. There are core files located within the webroot, along with the wp-includes and wp-admin directories. An integrity check will need to be performed to ensure that no core files have been maliciously modified.
There are a few different ways to manually check if core files have been modified on a CMS based website.
How to compare two text files with Diffchecker:
- Visit the Diffchecker website.
- Paste the clean core file text in the Original Text box.
- Paste the modified core file text in the Changed Text box.
- Select the Find Difference button towards the bottom.
- Compare the differences in text.
- Note down any suspicious code differences.
If you notice modifications to your core file, it may be infected. Continue checking more core files as others may have also been infected. If nothing has been modified, your core files are clean.
How to compare two files via SSH:
- Log into your server via SSH.
- Within a test directory, paste the clean core file text into a test .txt file.
- Within the same test directory, paste the modified core file text into a new test .txt file.
- Run the following command:
$ diff test1.txt test2.txt
- If there are modifications, this file may be hacked.
Sometimes, minor changes to these files may not indicate a hack — this is rare but can happen. However, obfuscated code in a core file is an indicator that there may be something malicious located there. Obfuscated code is written in such a way that requires decoding to understand, and is often used by attackers when trying to hide their malicious code.
If you come across obfuscated code in your files, here are some tools to help decode the content:
- Base64 Decode: Decodes base64 encoded strings.
- UnPHP: Decodes obfuscated malicious PHP code.
- CharCode Translator: Decodes CharCode.
- OnlinePHP.io: Decodes and tests PHP co
- UnPacker: Unpacks messy code.
1.3 Check Recently Modified Files
- Log into your server via SSH and navigate to your site’s home directory.
- Run the following command:
$ ls -1tlah | head -10
- Review the most recently modified files, starting at the top.
- Log into your server via SSH and navigate to your site’s home directory.
- Run the following command:
$ find . -type f -mtime -90
- Results will show an output with files that were modified within the last 90 days.
- Review these files. Unfamiliar modifications within the last 90 days may be suspicious.
- Log into cPanel and navigate to File Manager.
- Navigate to your site’s home directory and click Last Modified.
- View files with recently modified dates, starting at the top.
- Open the FileZilla client and connect to your website through FTP, FTPs, or sFTP.
- In the top menu go to View and then select Filename filters…
- On the popup menu, select Edit filter rules…
- Select New to create a new filter.
- Name your new filter how you will remember it, such as Date Filter
- Add the filter criteria. For Filter conditions: select Filter out items matching none of the following.
- Select Date from the first drop down and enter the date that matches what you are looking for in the format “YYYY-MM-DD”. Uncheck the box that says Directories and select OK. For example: If today is January 15th, 2022, and you want to find files that were modified within the last 15 days, you would put 2022-01-01 in the textbox.
- Check the box next to your newly created filter, select Apply, and then select OK to close the window.
1.4 Check Google Diagnostic Pages
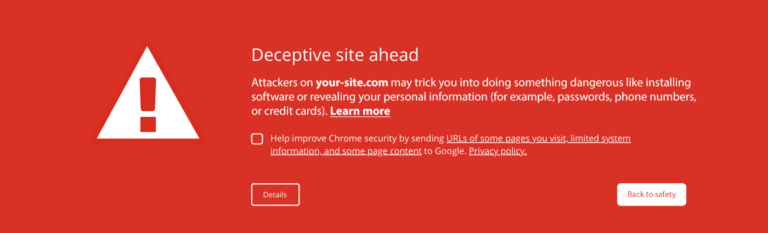
If your WordPress website has been hacked and blocklisted by Google or other website security authorities, you can use their diagnostic tools to check the security status of your website.
How to check your Google Transparency Report:
- Visit the Safe Browsing Site Status website.
- Enter your site URL and search.
- On this page you can check:
- Site Safety Details: Information about malicious redirects, spam and downloads.
- Testing Details: Most recent Google scan that found malware.
If you have added your site to any free webmaster tools, you can check their security ratings and reports for your website. If you do not already have accounts for these free monitoring tools, we highly recommend that you sign up:
If your website is listed on any major blocklisting vendors, you can use VirusTotal to analyze the issue.
How to check your website on VirusTotal:
- Visit the VirusTotal website
- Click the URL tab, enter your site URL, and search
- On this page you can check:
- Detection: Check a website blocklist status from 70+ vendors.
- Details: View the history and HTTP response from your site.
- Links: Review any outgoing links.
- Community: Review comments from the public about the safety of your site.
STEP 2
Remove Malware from Your WordPress Site & Database
The steps listed below require access to the WordPress file structure and database. You will need access via sFTP/FTP/SSH to view your file structure, along with database credentials to access your database. If you are not familiar with manipulating database tables or editing PHP, please seek assistance from a professional Incident Response Team member who can completely remove WordPress malware.
2.1 Clean Hacked WordPress Files
WordPress is made up of many files and folders that all work together to create a functional website. Most of these files are core files, which are consistent across installations of the same version.
If the infection is in your core files, you can fix the malware manually by downloading a fresh installation from the official WordPress site and replacing each compromised file with clean copies. Just don’t overwrite your wp-config.php file or wp-content folder and be sure to make a full backup beforehand.
How to clean hacked WordPress core files:
- Note down the version of your WordPress site by viewing the file wp-includes/version.php.
- Navigate to the official WordPress site and download the version that matches your wp-includes/version.php file.
- Extract the WordPress installation on your computer.
- Log into your file structure either through sFTP/FTP or through your hosting account.
- Replace each infected core file with a clean copy.
How to manually clean hacked WordPress plugin & theme files:
- Download a clean plugin/theme copy from a working backup, or from the official WordPress site.
- Extract the plugin/theme copy on your computer.
- Log into your file structure either through sFTP/FTP or through your hosting account.
- Replace the applicable plugin/theme folder within ./wp-content/plugins or ./wp-content/themes with the clean copy.
- Open any custom or premium files (not in the official repository) with a text editor.
- Remove any suspicious code from the custom files.
- Test to verify the site is still operational after changes.
How to clean a hacked WordPress plugin through the dashboard:
- Log into your WordPress dashboard and navigate to the Installed Plugins section underneath Plugins.
- Deactivate and delete the applicable plugins.
- Install & activate each plugin from the dashboard or upload a clean copy from a working backup.
Important Note: Restore a plugin or theme from a clean backup if they have been customized in any way to avoid erasing any changes you have made.
Caution: Do not replace any content within the wp-content directory or replace the wp-config.php file.
2.2 Clean Hacked Database Tables
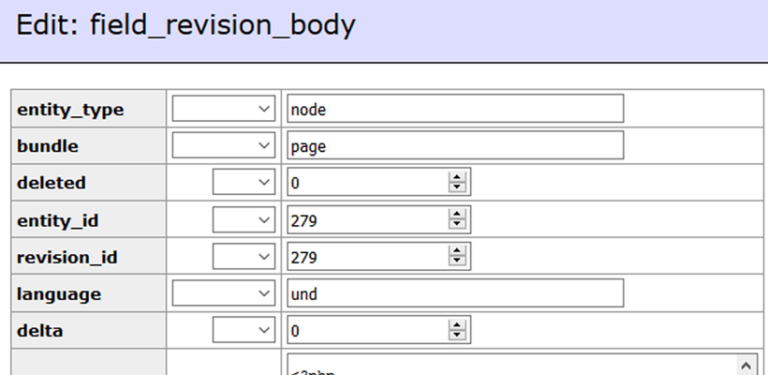
To remove a malware infection from your WordPress database, use your database admin panel to connect to the database. You can also use tools like PHPMyAdmin or Adminer.
How to manually remove a malware infection from your WordPress database:
- Log into your database admin panel.
- Make a backup of the database before making changes.
- Search for suspicious content (i.e., spammy keywords, malicious links).
- Open the row that contains suspicious content.
- Manually remove any suspicious content.
- Test to verify the site is still operational after changes.
- Remove any database access tools you may have uploaded.
Beginners can use the payload information provided by the malware scanner. Intermediate users can also manually look for common malicious PHP functions, such as eval, base64_decode, gzinflate, preg_replace, str_replace, etc.
You may notice that your website was hacked on a certain date and unrecognizable spam posts were injected into your site. This may occur if an administrator’s password becomes compromised.
How to move WordPress posts to the trash after a certain date:
- Log into your database admin panel.
- Make a backup of the database before making changes.
- Navigate to SQL Command at the top left.
- Note down your WordPress database prefix. wp_ is most commonly used.
- Note down what date the spam posts started.
Run the following SQL Command:
UPDATE `wp_posts` SET `post_status` = ‘trash’ WHERE `post_status` = ‘publish’ AND `post_type` = ‘post’ AND `post_date` > ‘2018/03/08’;
Important Note: Make sure to replace the date in the SQL command above with the date applicable to when you noticed the spam posts started. In the example above, it will remove all posts that have a date of March 9th, 2018 and younger.
Also ensure that you match the format of the date with how your dashboard is displayed, which can be found at the top right of your posts section.
Caution: Note that these functions are also used by plugins for legitimate reasons, so be sure you test changes or get help so you do not accidentally break your site. When dealing with database records, the data may not always be plainly simple to replace especially if its in the wp_options table.
2.3 Secure WordPress User Accounts
Attackers will often create malicious admin users and/or FTP users to gain access back into your site at a later date, so it’s vital to review user account access through every possible entry point into your site. If a WordPress site becomes infected and is cleaned but the malicious admin/FTP users remain, the site will quickly become reinfected.
Remove any users you do not recognize so the hackers no longer have access, including:
- FTP Users
- SSH Users
- WordPress Admin
- Users
- Additional Database Users
How to manually remove suspicious users from WordPress:
- Backup your site and database before proceeding.
- Log into WordPress as an admin and click Users.
- Find the suspicious new user accounts.
- Hover over the suspicious user and click Delete.
If a user has content associated with it, you will be prompted with the option to keep or remove any associated content. It is recommended that you keep the content and manage it afterwards to avoid any unintentional data loss.
If you believe any of your user accounts were compromised you can reset their passwords. One of the ways to do that is using the Sucuri WordPress plugin.
We recommend assigning only one admin user and setting other user roles to the least amount of privileges needed (ie. contributor, author, editor).
Note: Certain malware infections will add malicious email accounts if available on a hosting platform. (For example, the Anonymous Fox infection.) Log into your hosting account and view the Email Accounts if applicable. Remove any users you do not recognize.
2.4 Remove Hidden Backdoors in Your WordPress Site
Hackers always leave a way to get back into your site. More often than not, we find multiple backdoors of various types in hacked WordPress sites.
Often backdoors are embedded in files named similar to WordPress core files but located in the wrong directories. Attackers can also inject backdoors into files like wp-config.php and directories like wp-content/themes, wp-content/plugins, and wp-content/uploads.
Backdoors commonly include the following PHP functions:
- base64
- str_rot13
- gzuncompress
- eval
- exec
- system
- assert
- stripslashes
- reg_replace (with /e/)
- move_uploaded_file
These functions can also be used legitimately by plugins, so be sure to test any changes because you could break your site by removing benign functions or by not removing all of the malicious code.
The majority of malicious code we see in WordPress sites uses some form of encoding to prevent detection. Aside from premium components that use encoding to protect their authentication mechanism, it’s very rare to see encoding in the official WordPress repository.
It is critical that all backdoors are closed to successfully stop a WordPress hack, otherwise your site will be reinfected quickly.
2.5 Remove Malware Warnings
If you were blocklisted by Google, McAfee, Yandex (or any other vendor), you can request a review after your WordPress site has been cleaned and the hack has been fixed. You will need to fill in a review request form for each blocklisting authority.
How to remove malware warnings on your site:
- Call your hosting company and ask them to remove the suspension if your website has been suspended by your hosting provider.
– You may need to provide details about how you removed the malware. - Fill in a review request form for each blocklisting authority.
– ie. Google Search Console, McAfee SiteAdvisor, Yandex Webmaster.
With the Sucuri Website Security Platform, we submit blocklist review requests on your behalf. This helps ensure your site is absolutely ready for review. Some reviews, however, such as web spam hacks as a result of manual actions, can take up to two weeks.
STEP 3
Protect Your WordPress Site From Future Hacks
In this final step, you will learn how to fix the issues that caused your WordPress to be hacked in the first place. You will also perform essential steps to enhance the security of your WordPress site.
3.1 Update Out-of-Date Software
Outdated software is one of the leading causes of infections. This includes the WordPress version, plugins, themes, and any other pieces of software installed on the site. Critical vulnerability patches are released often by plugin & theme authors and it is crucial to stay up to date on the latest updates.
Update all software on your server (i.e., Apache, cPanel, PHP) to ensure that there are no security patches missing. This includes:
- Out of date plugins
- Out of date themes
- Apache version
- PHP version
- WHM/cPanel version
- WordPress version
It is advisable to reinstall all plugins and extensions after a hack to ensure they are functional and free of residual malware.
Note: Create a working backup before updating software, as sometimes this process can break your site.
How to update out of date software through the WordPress Dashboard:
- Log into your WordPress dashboard and hover over Dashboard at the top left, then select Updates.
- Update all plugins and themes.
- Update your WordPress version, if applicable.
- You can reinstall the WordPress version from this page to replace all core files if needed.
How to update plugins & themes manually:
- Log into your server via SFTP or SSH.
- Manually remove and replace plugins and themes with copies from official sources.
- Log into WordPress as an admin and click Dashboard > Updates.
- Apply any missing updates.
- Open your website to verify it is operational.
Remove Unused Software
Tidy up your environment by removing any pieces of software that are not in use. This creates fewer entry points for attackers and keeps things clean and tidy.
Before removing any items, ensure that you are removing software that is not needed for the functionality of your website. Make sure to have a working backup that you can restore from before removing any unused software.
Review and remove the following:
- Unused plugins
- Unused themes
- Database management tools
Pro Tip: You can deactivate a plugin or theme first and test the functionality of your website before deleting unused software.
3.2 Change User Passwords
It is critical that you change passwords for all access points to your WordPress site. This includes WordPress user accounts, FTP/SFTP, SSH, cPanel, and your database.
You should reduce the number of admin accounts for all of your systems to the absolute minimum. Practice the concept of least privilege. Only give people the access they require to do the job they need for just as long as they need it.
All accounts should use strong passwords. A good password is built around three components – complexity, length, and uniqueness. You can generate a secure password with Passwords Generator and utilize a password manager to keep track of your passwords.
Generate New Secret Keys
Once the passwords are reset, you can force all users to log off using our plugin. WordPress uses browser cookies to keep user sessions active for two weeks. If an attacker has a session cookie, they will retain access to the website even after a password is reset. To fix this, we recommend forcing active users off by resetting WordPress secret keys.
How to generate new secret keys in the wp-config.php file using Sucuri:
- Open the WordPress wp-config.php file.
- Add a value of 60+ unique characters for each key and salt.
- You can use a secret key generator.
- Save the wp-config.php file.
3.3 Harden Your WordPress Site
To harden a server or application means that you take steps to reduce the attack surface or entry points for attackers.
There are countless ways to harden your website. Here are some recommendations to better protect and defend your site.
Reduce the number of entry points:
Only allow the public to access parts of your website that are intended for public usage. Deny entry to all other sections of your site with server configuration rules or a web application firewall.
Keep your website & server updated:
Out of date software is one of the leading causes of infection and reinfection. Be sure to stay on top of software and server updates to better protect your site.
Use secure passwords and multi-factor authentication:
Use long, secure, and random passwords for FTP and administrative access. Restrict access to administrative panels by requiring multi-factor authentication.
Isolate Your Website
Cross contamination is a leading cause of infections & reinfections. We recommend isolating each website into their own hosting plan to avoid malware from spreading. It only takes one compromised admin password to infect each site if housed on the same hosting plan.
To minimize the chances of cross contamination, follow the steps below:
- Backup and remove unused websites.
- Migrate each website into their own isolated hosting plan.
- Use a dedicated user for each website. This allows only the dedicated user to access, modify, and delete files of the site it is assigned to.
You can also review our basic hardening steps article in more detail. Some highlights from this article include implementing the following:
- WordPress Dashboard Multi-Factor Authentication (2FA)
- WordPress Dashboard IP Access Restriction
- WordPress Dashboard Limit Logins
There are countless ways to harden WordPress depending on your needs. We recommend reviewing the WordPress Codex if you want to research additional hardening methods. See the Website Firewall section below for more information about how we offer virtual patching and hardening.
3.4 Set Backups for your WordPress Site
Backups function as a safety net. Now that your WordPress site is clean and you’ve taken some important post-hack steps, make a backup! Having a good backup strategy is at the core of a good security posture.
Here are some tips to help you with WordPress backups:
Location: Store your backups in an off-site location. Never store backups or old versions on your server, as these can be utilized as entry points for attackers if not maintained properly. It is important to keep working backups in many different locations, as you never know what can go wrong.
Automatic: Your backup solution should run automatically at a frequency that suits the needs of your website. For example, if your website is a news based site that is updated frequently, your backups need to run frequently as well.
Redundancy: This is a strategy used to ensure there are emergency backups of critical data if something catastrophic were to occur. Make sure to have working backups and then make copies of those working backups.
Testing: Ensure that your backups are clean from malware and function if you need to restore. Do not rely on backups unless they have been tested first.
File Types: Some backup solutions exclude certain file types such as videos and archives, as they can be large. Make sure that everything is included in your backup once performed.
Did you know
Sucuri offers its customers an affordable system for secure website backups.
3.5 Scan Your Computer
Have all WordPress users run a scan with a reputable antivirus program on their operating systems.
WordPress can be compromised if a user with an infected computer has access to the dashboard. Some infections are designed to jump from a computer into text editors or FTP clients.
Paid Antivirus Programs:
- Bitdefender
- Kaspersky
- Sophos
- F-Secure.
Free Antivirus Programs:
Tip: You should have only one antivirus actively protecting your system to avoid conflicts.
3.6 Use a Website Firewall
The number of vulnerabilities exploited by attackers grows every day. Trying to keep up is challenging for administrators. Website Firewalls were invented to provide a perimeter defense system surrounding your WordPress site.
Benefits to using a website firewall include:
Prevent a Future Hack: By detecting and stopping known hacking methods and behaviors, a website firewall can keep your site protected against future attacks.
Virtual Security Update: Hackers quickly exploit vulnerabilities in plugins and themes, and unknown ones are always emerging (called zero-day exploits). A good website firewall will patch your holes in your website software even if you haven’t applied security updates.
Block Brute Force Attacks: A website firewall should stop anyone from accessing your wp-admin or wp-login page if they aren’t supposed to be there, making sure they can’t use brute force automation to guess your password. Multiple features are used to help prevent brute force attacks, such as: Time delays, limiting login attempts, blocklisting IP addresses, and more.
Mitigate DDoS Attacks: Distributed Denial of Service attacks attempt to overload your server or application resources. By detecting and blocking all types of DDoS attacks, a website firewall makes sure your site is available if you are being attacked with a high volume of fake visits.
Performance Optimization: Most WAFs will offer caching for faster global page speed. This keeps your visitors happy and is proven to lower bounce rates while improving website engagement, conversions, and search engine rankings.
WordPress Hacks FAQ
How do WordPress sites get hacked?
How do I scan WordPress plugins for malware?
How do I find malicious code in WordPress?
How do I protect my WordPress site from malware?
- Having a WordPress firewall
- Using the latest version of WordPress, plugins, themes and third-party services
- Enforcing strong password requirements
- Only granting the type of access that someone needs
- Isolating each WordPress website
- Implementing 2FA on the WordPress login page
- Limiting Login Attempts on wp-admin
- Leveraging IP access restrictions for the WordPress dashboard
Sucuri Resource Library
Say on top emerging website security threats with our helpful guides, email, courses, and blog content.